How to create a cross-region serverless application in 5 minutes
Serverless computing allows developers, operators, and businesses to create applications that add business value without introducing operational overhead.
There are several tenets associated with serverless computing:
- No infrastructure to manage, freeing operators from patching and management activities.
- Built-in scalability, allowing applications to scale from zero to peak levels.
- Pay for value, where resources don't need to be overprovisioned to plan for peak levels.
- Built-in fault tolerance, allowing applications to have a high degree of resiliency with no additional effort on the part of the application developer.
Through its use of an innovative, serverless architecture, Vendia Share possesses all the benefits listed above. Unis allow different organizations or companies to share data across clouds, regions, accounts, and technology stacks. Each participant is represented as a node in the uni. Every node has a common view of the uni's data. Nodes are deployed to specific geographic regions and cloud service providers (CSPs). By allowing customers to deploy nodes across multiple regions, Vendia makes it easy to model multi-region endpoints without the heavy lift usually associated with supporting multi-region data tiers in distributed applications.
To accomplish this, Vendia uses the data model you provide to create a typesafe, distributed database layer. It deploys and choreographs serverless resources that distribute transactions across all nodes, regardless of where the transaction originated. Each update is fully replicated, totally ordered, and provides every node with a strong read-after-write consistency model. This makes multiple reader/multiple writer applications easy to construct, even when nodes span different continents, backend systems, CSP accounts, or even owners.
Example use case: Deploying a weather station application
For our example, a weather station application, we'll create a data model to capture weather-related properties - timestamp, airport code, and air temperature. Our Uni is made of two nodes, each representing a weather station - one at Newark Liberty International Airport (EWR) and the other Los Angeles International Airport (LAX). While we won't go into details of how data is initially collected or used, you can imagine a full-blown use case where "writes" of data represent IoT sensors operating in each locale, while "reads" of data represent report generation, mobile device usage, or other presentations of the aggregated data. The rest of our application will benefit from the simplicity of the uni's automated generated GraphQL API and its straightforward read-after-write consistency semantics.
To follow along, start with the three reference files provided below - we'll pass them to Vendia Share's Command Line Interface (CLI) to create our test-weather-station uni. You can read more about the role of these files in the quickstart.
Setup
We'll be deploying our uni using the Vendia share CLI. We'll be using your user information to deploy our uni.
- Follow the instructions on our documentation site to download and install it.
- You'll also need to register for the Vendia Share service if you haven't already done so.
The schema.json File
The schema file defines the shape of data in your application, and is used to create a custom GraphQL API that supports reading and writing data with your uni. You provide your data model in the form of a JSON Schema file. Vendia Share automatically converts your data model into a full serverless application, including data storage, transaction support, GraphQL APIs for each node, and more.
{
 "$schema": "http://json-schema.org/draft-07/schema#",
 "$id": "http://vendia.com/schemas/demos/weather-station.json",
 "title": "Weather Station Demo",
 "description": "Store temperature data from fictitious weather stations",
 "type": "object",
 "properties": {
       "Temperature": {
           "description": "Weather station temperature data",
           "type": "array",
           "items": {
               "type": "object",
               "properties": {
                   "airportCode": {
                       "description": "Airport code of the weather station",
                       "type": "string"
                   },
                   "timestamp": {
                       "description": "Timestamp of data collection",
                       "type": "string"
                   },
                   "temperature": {
                       "description": "Temperature in celsius",
                       "type": "number"
                   }
               },
               "required": [ "airportCode", "timestamp", "temperature" ]
           }
       }
   }
}
The initial-data.json File
For testing or to "bootstrap" an application in production, it can be useful to start with some initial data. Vendia Share supports this through the optional initial data file. If you decide to use one, make sure that the JSON data it contains conforms to the JSON Schema you provided as the data model. (Vendia Share will also check this for you automatically and issue an error if the data doesn't match your schema.)
{
   "Temperature": [
       {
           "airportCode": "EWR",
           "timestamp": "2021-01-01T00:00:00Z",
           "temperature": 1
       },
       {
           "airportCode": "LAX",
           "timestamp": "2021-01-01T00:00:00Z",
           "temperature": 12
       },
       {
           "airportCode": "EWR",
           "timestamp": "2021-01-01T01:00:00Z",
           "temperature": 1.3
       },
       {
           "airportCode": "LAX",
           "timestamp": "2021-01-01T01:00:00Z",
           "temperature": 12.5
       },
       {
           "airportCode": "EWR",
           "timestamp": "2021-01-01T02:00:00Z",
           "temperature": 0.8
       },
       {
           "airportCode": "LAX",
           "timestamp": "2021-01-01T02:00:00Z",
           "temperature": 12.3
       }
   ]
}
The registration.json File
Finally, the registration file tells your uni how many nodes to create and where to place them geographically. Note that the contents of your actual file will need to be updated to reflect your own Vendia Share account. In our weather station example, both nodes are owned by the same account, but that's not required - you can create multi-owner (or multi-account within the same owner) unis as easily as you can create multi-region unis. Note the region parameter - it should be a CSP-specific region name, and tells Vendia Share where you want that node to reside geographically.
Reminders: The example will not work without a valid userId; make sure to replace it with your own ID before proceeding! Also, uni names in Vendia Share are globally unique. For this example, please update your uni with a unique name, taking care to preserve the test- prefix.
{
   "name": "test-weather-station",
   "schema": "schema.json",
   "initState": "initial-state.json",
   "nodes": [
       {
          "name": "EwrStation",
          "userId": "user@domain.com",
          "region": "us-east-1",
          "settings": {
            "apiSettings": {
              "auth": {
                "authorizerType": "API_KEY"
              }
            }
          }
        },
        {
          "name": "LaxStation",
          "userId": "user@domain.com",
          "region": "us-west-2",
          "settings": {
            "apiSettings": {
              "auth": {
                "authorizerType": "API_KEY"
              }
            }
          }
        }
   ]
}
Creating the example Uni
Once the schema, initial data, and registration files are saved, we can deploy the uni. Run the following command to create your cross-region uni test-weather-station.
share uni create --config registration.json
Our two-node uni will be created in about 5 minutes. A cross-region, scalable uni with strongly consistent, ordered data will be deployed to AWS's us-east-1 and us-west-2 regions.
Now, let's experiment with our newly created cross-region uni!
Working with uni data
When a uni is deployed there are several serverless resources created for each node in the uni, including a GraphQL API endpoint to model reading data (GraphQL queries) and writing data (GraphQL mutations). Note that you don't have to design, develop, or deploy these manually - Vendia figures them out using the JSON Schema you provided and creates, deploys, manages, and monitors them for you throughout your Uni's lifetime - no additional work is required on your part.
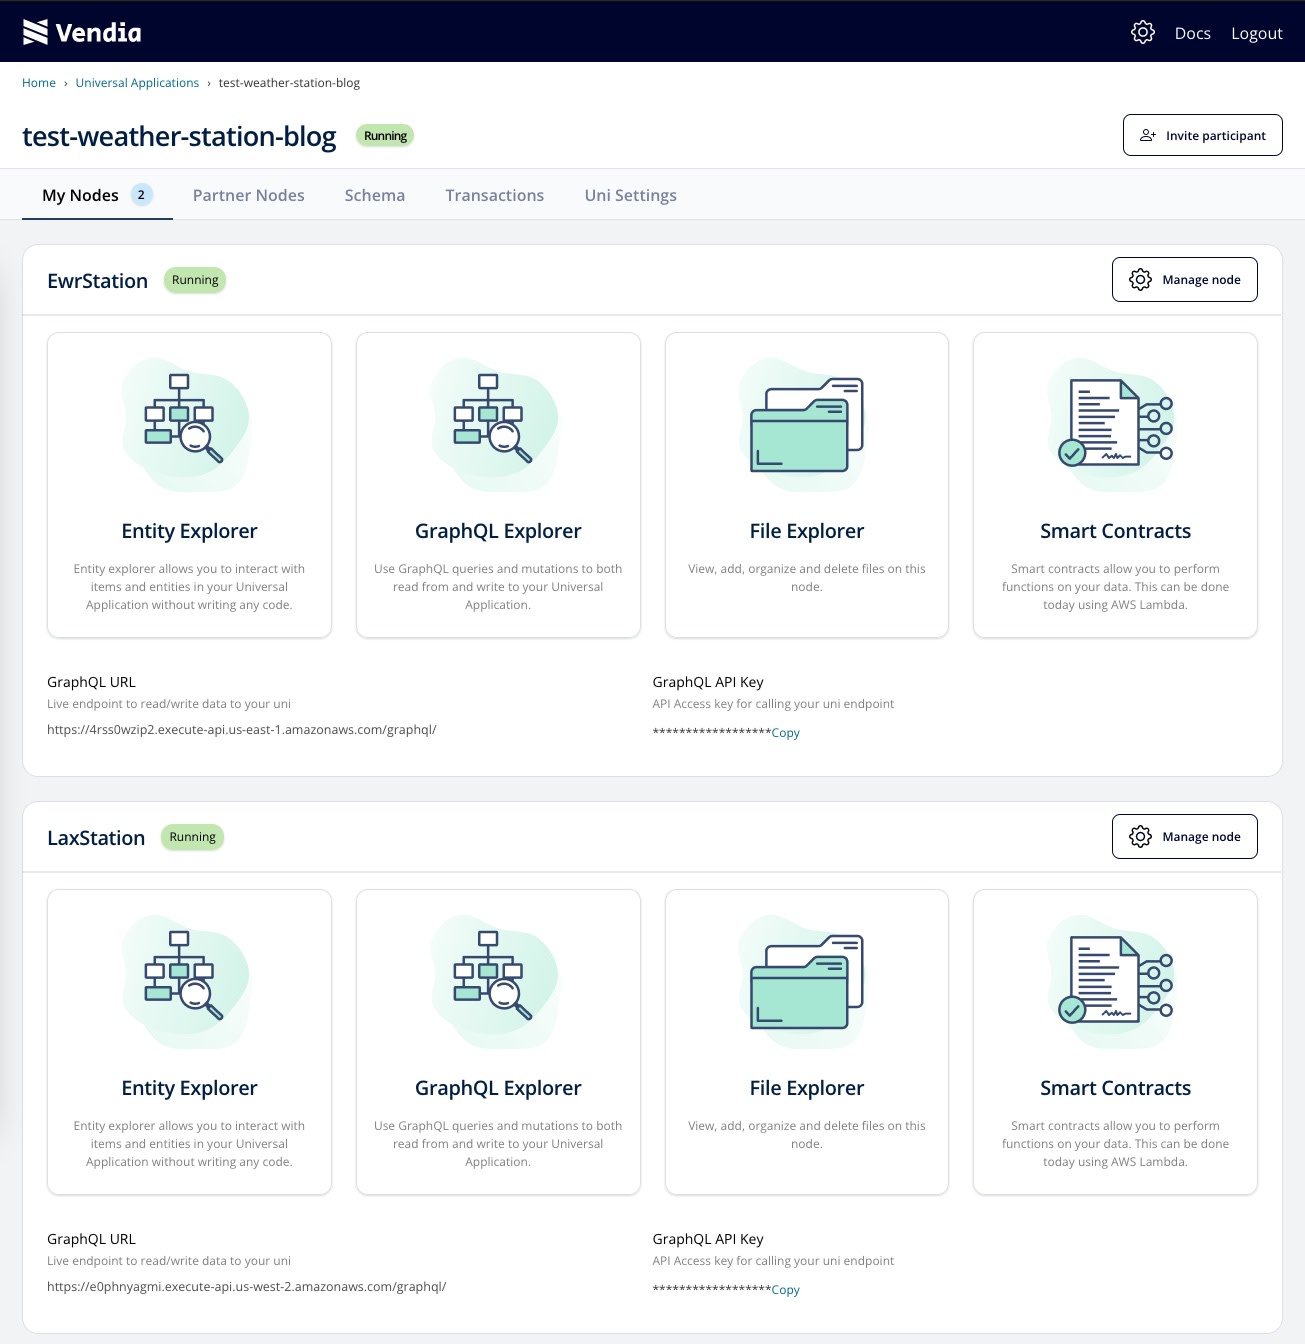
Now, let's take a look at the user-visible resources in each node. The EwrStation node has resources that were deployed in AWS's us-east-1 region while the LaxStation node has resources deployed in AWS's us-west-2 region. This matches our node definition in the registration.json file.
For the sake of this demonstration, we will be interacting with the GraphQL explorer provided by the Vendia Share web application for both the EwrStation and LaxStation nodes. In a real-world deployment, you'd probably be hooking the GraphQL mutations up to IoT sensors or other data inputs while using the queries to create web or mobile applications and/or integrating them with other parts of your cloud-based application.
Querying data
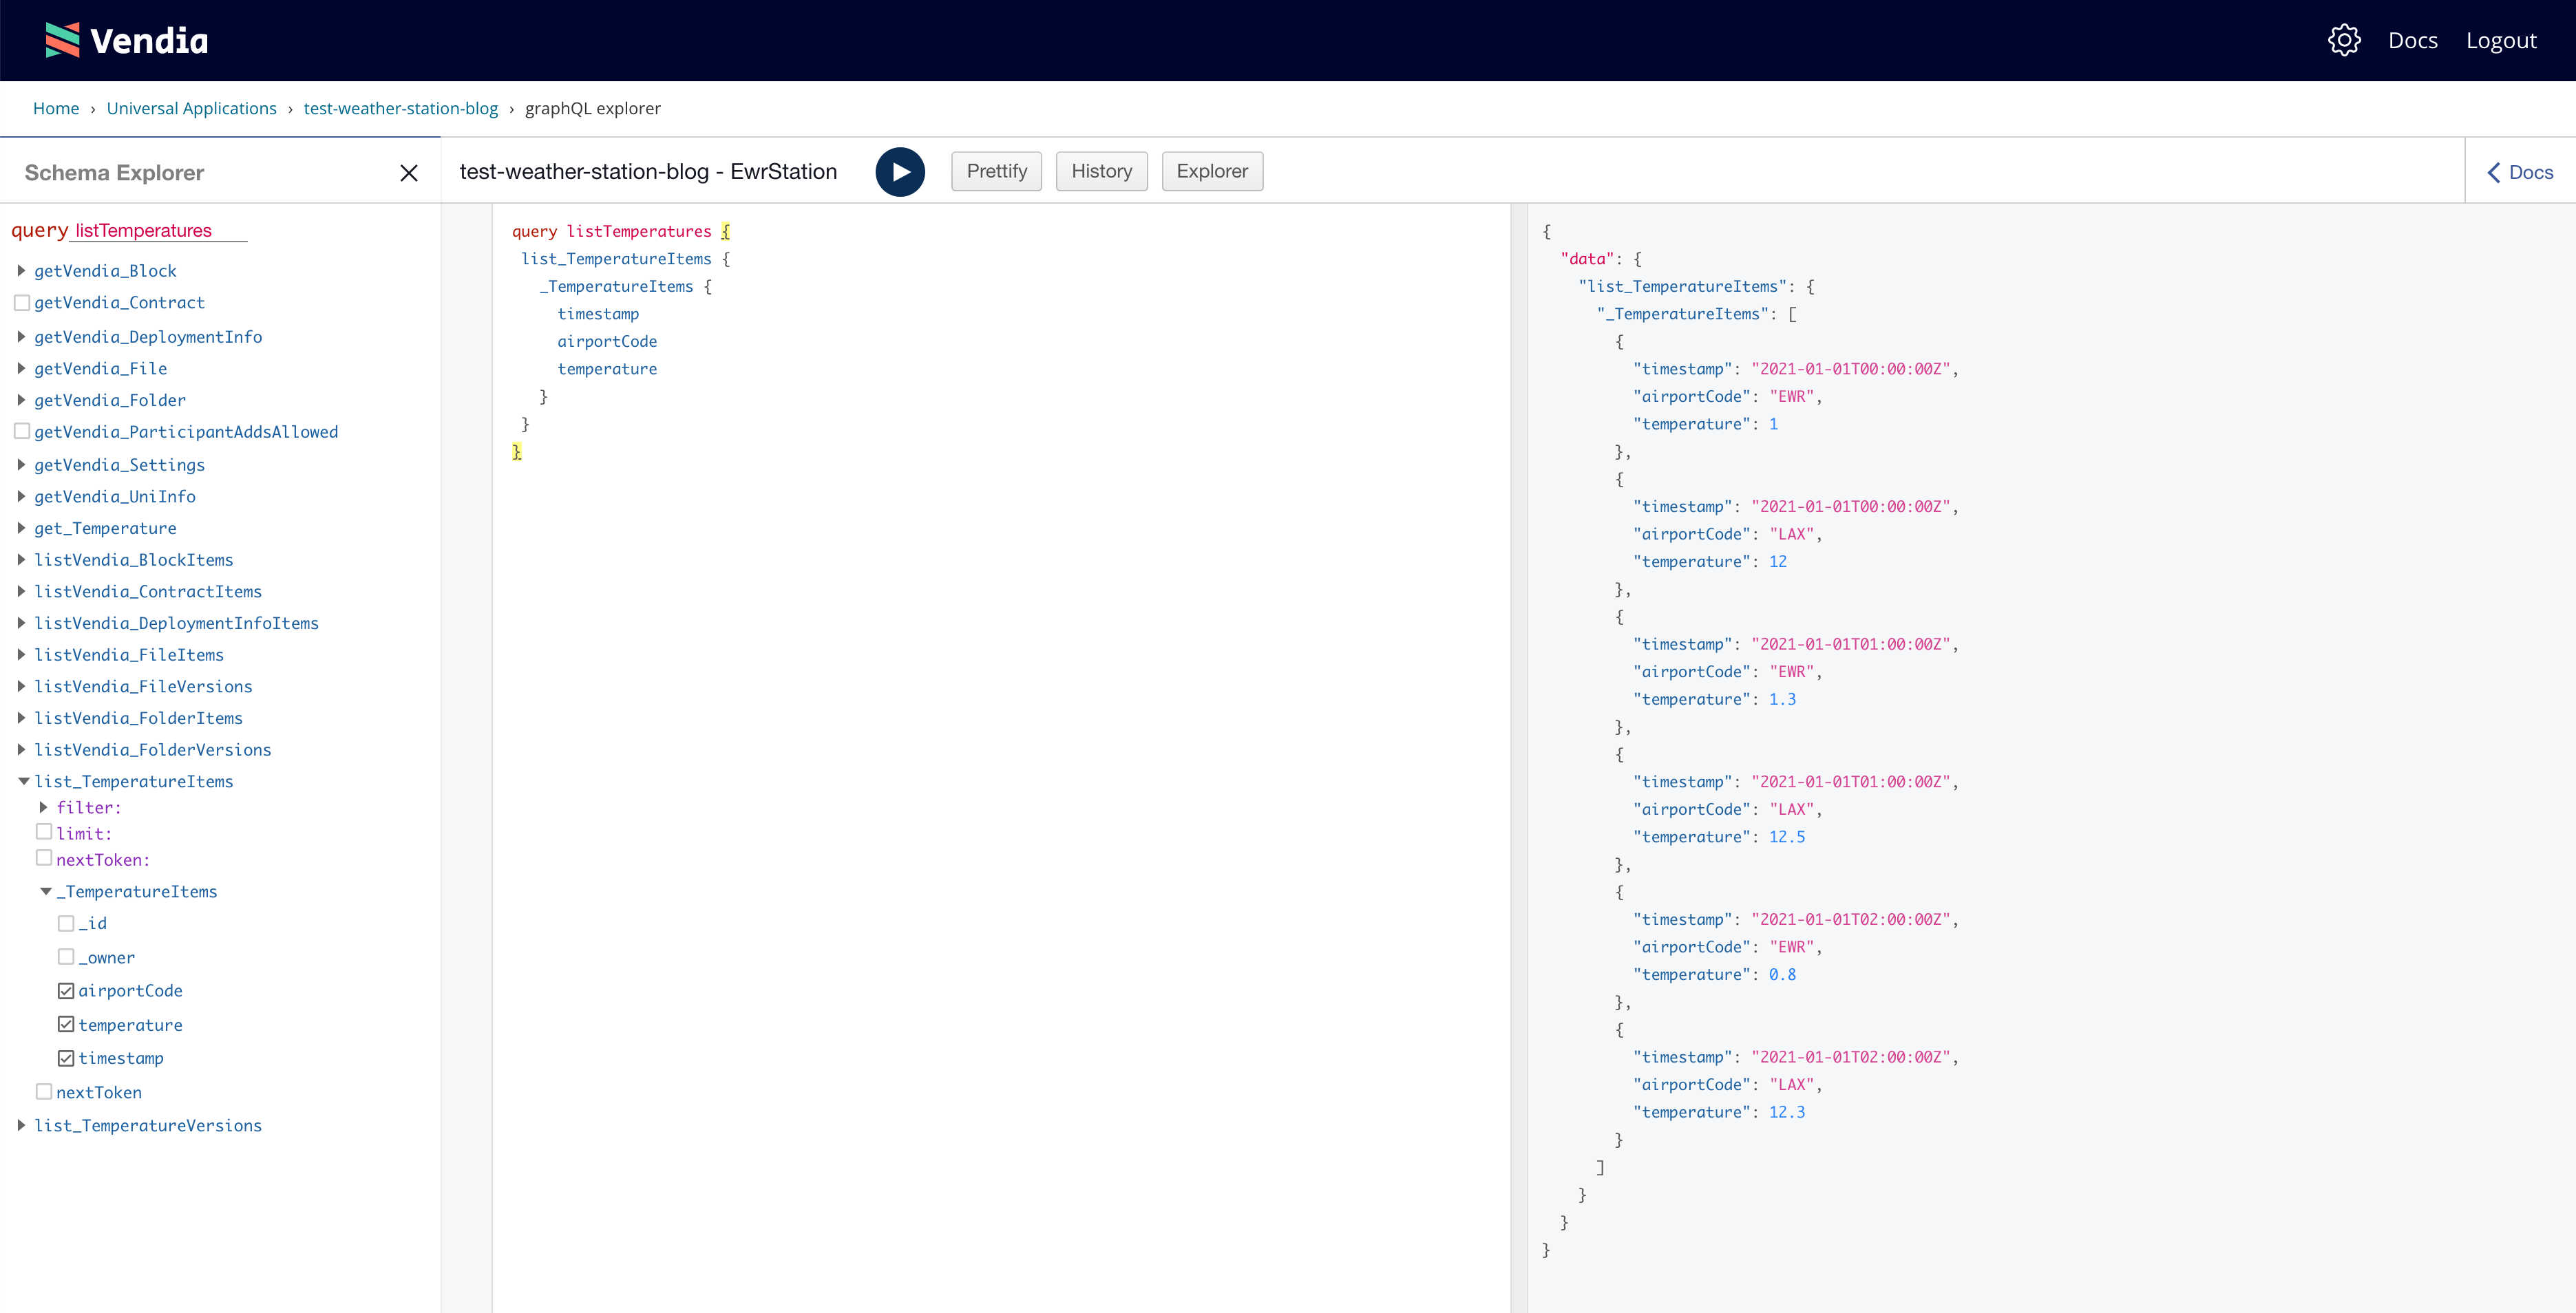
Recall that when we created our Uni, we seeded it with data from the initial-state.json file. Let's go ahead and query that initial data, which is stored in every node in our uni. First, click on the 'Open GraphQL Explorer' in the Vendia Share web application for the EwrStation node and list all of the Temperatures stored in the uni:
query listTemperatures {
 listTemperatures {
   Temperatures {
     timestamp
     airportCode
     temperature
   }
 }
}
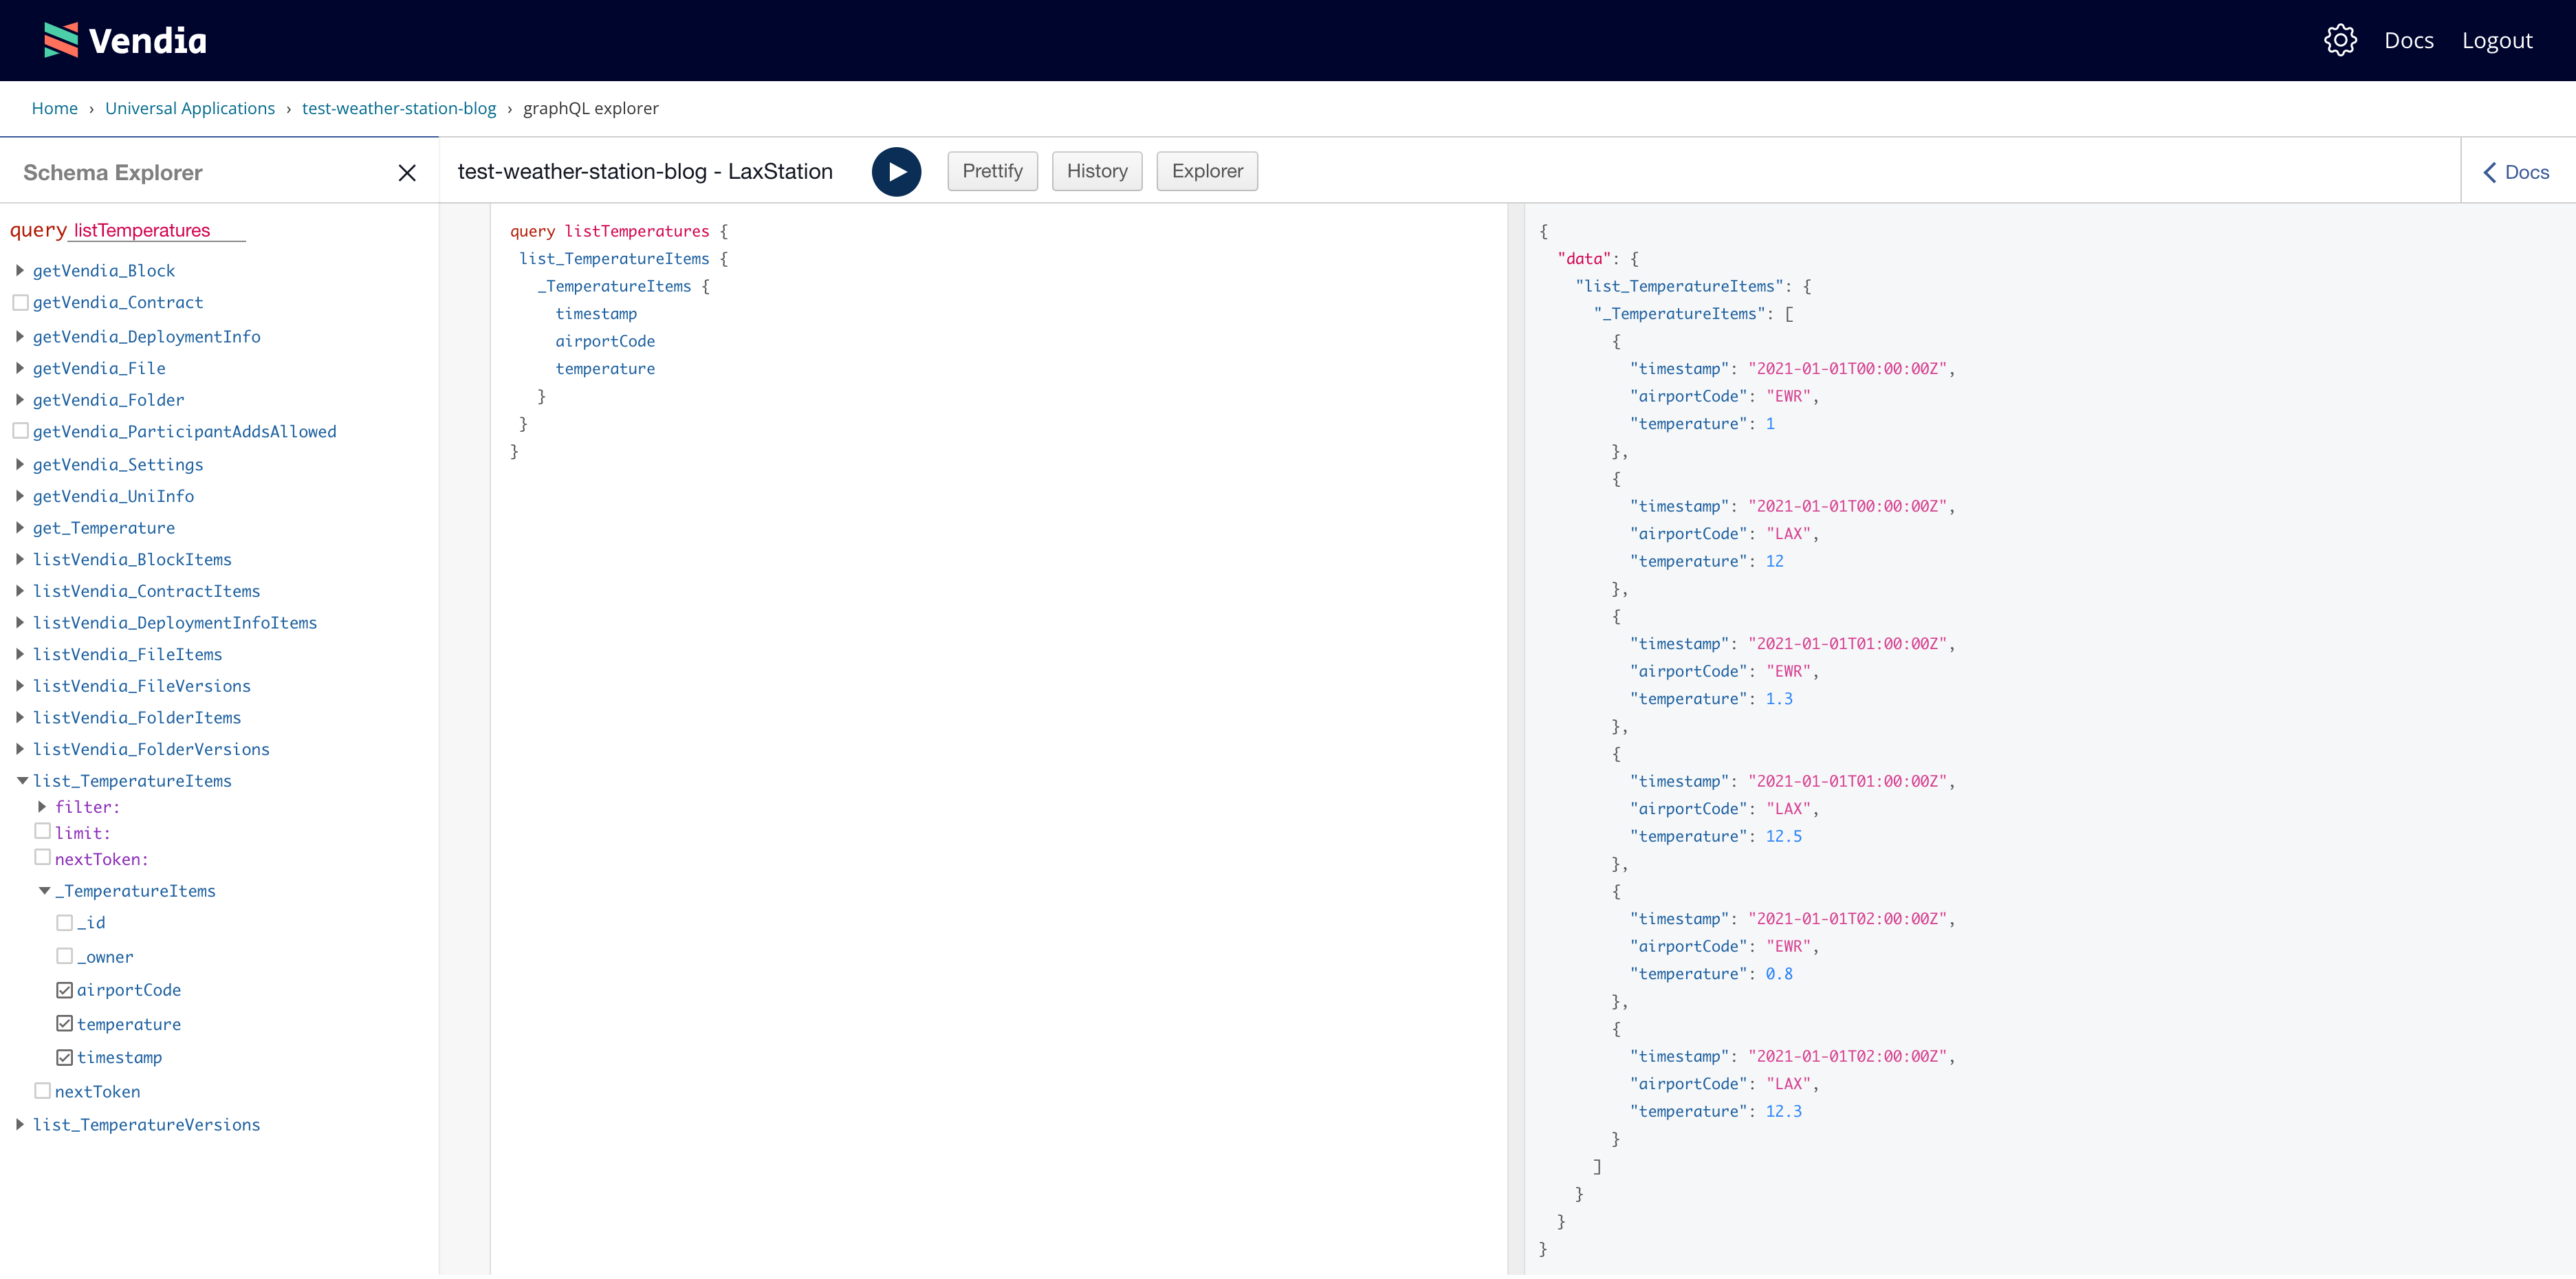
Next, let's go back to our uni's setting page and click on the 'Open GraphQL Explorer' for our LaxStation node and list all of the Temperatures stored in the uni:
query listTemperatures {
 list_TemperatureItems {
   _TemperatureItems {
     timestamp
     airportCode
     temperature
   }
 }
}
The results across both nodes - in separate AWS regions - are the same.
Adding new data
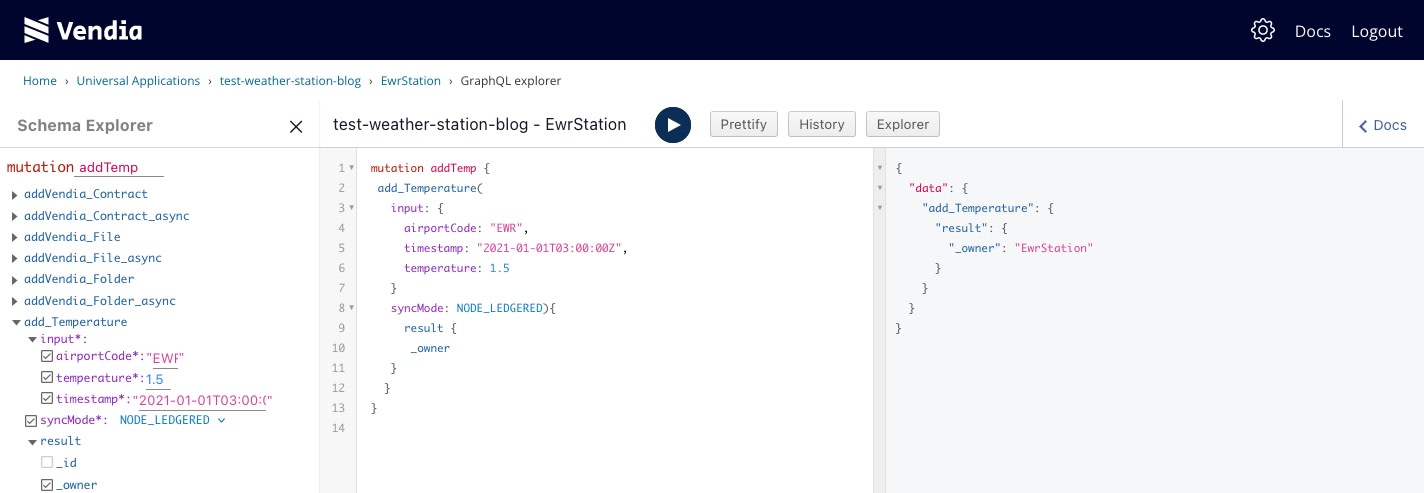
So far we've assured ourselves that both nodes have a consistent view of the initial data that was already present in the uni. Now let's add a new temperature - we'll do this manually for the example, but in practice you'd likely be generating it automatically. Let's go ahead and add a sample reading to the EwrStation node. Click on 'Open GraphQL Explorer' from the uni setting page and run the following GraphQL mutation:
mutation addTemp {
 add_Temperature(
   input: {
     airportCode: "EWR",
     timestamp: "2021-01-01T03:00:00Z",
     temperature: 1.5
   }
   ){
     transaction {
      transactionId
   }
  }
}
Querying newly added data
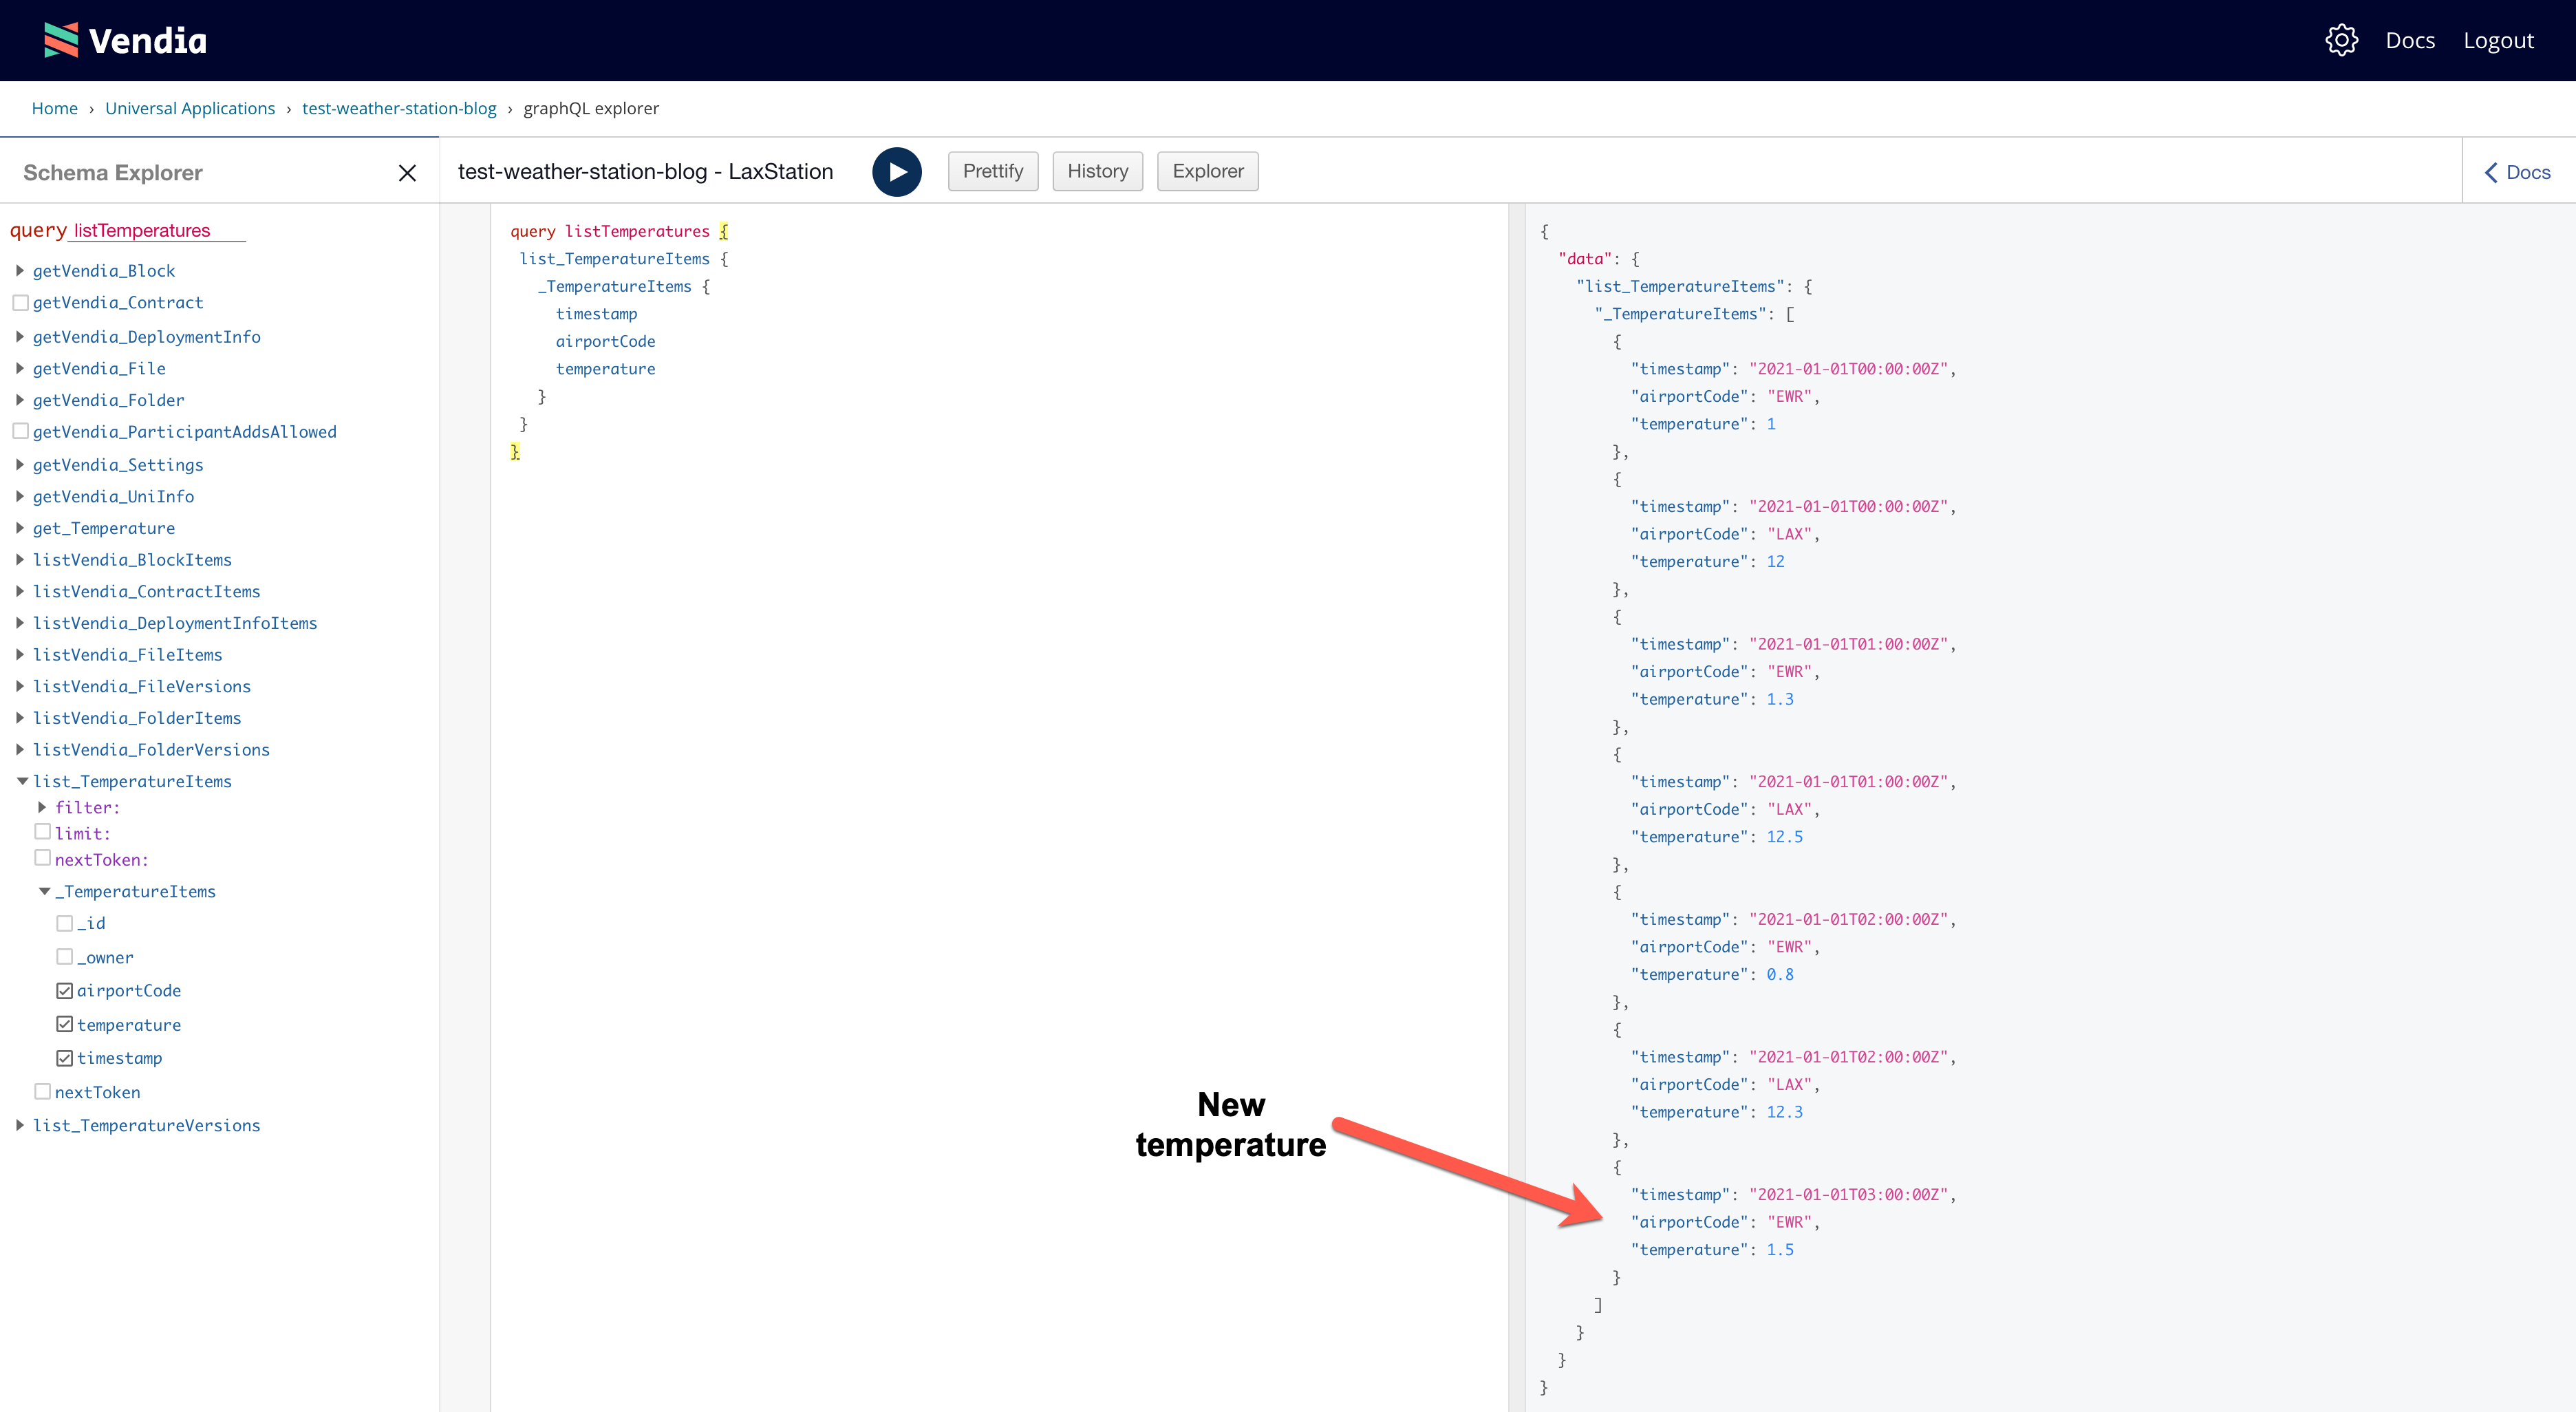
At this point we've added a new temperature. Let's make sure it's visible across both of our nodes in separate AWS regions. To do that, go back to our uni's setting page and click on the 'Open GraphQL Explorer' of the LaxStation node. Let's then go ahead and list our temperatures.
query listTemperatures {
 list_TemperatureItems {
   _TemperatureItems {
     timestamp
     airportCode
     temperature
   }
 }
}
Let's go back to the uni setting page and click on the 'Open GraphQL Explorer' of the EwrStation node. Let's then go ahead and list our temperatures.
query listTemperatures {
 listTemperatures {
   Temperatures {
     timestamp
     airportCode
     temperature
   }
 }
}
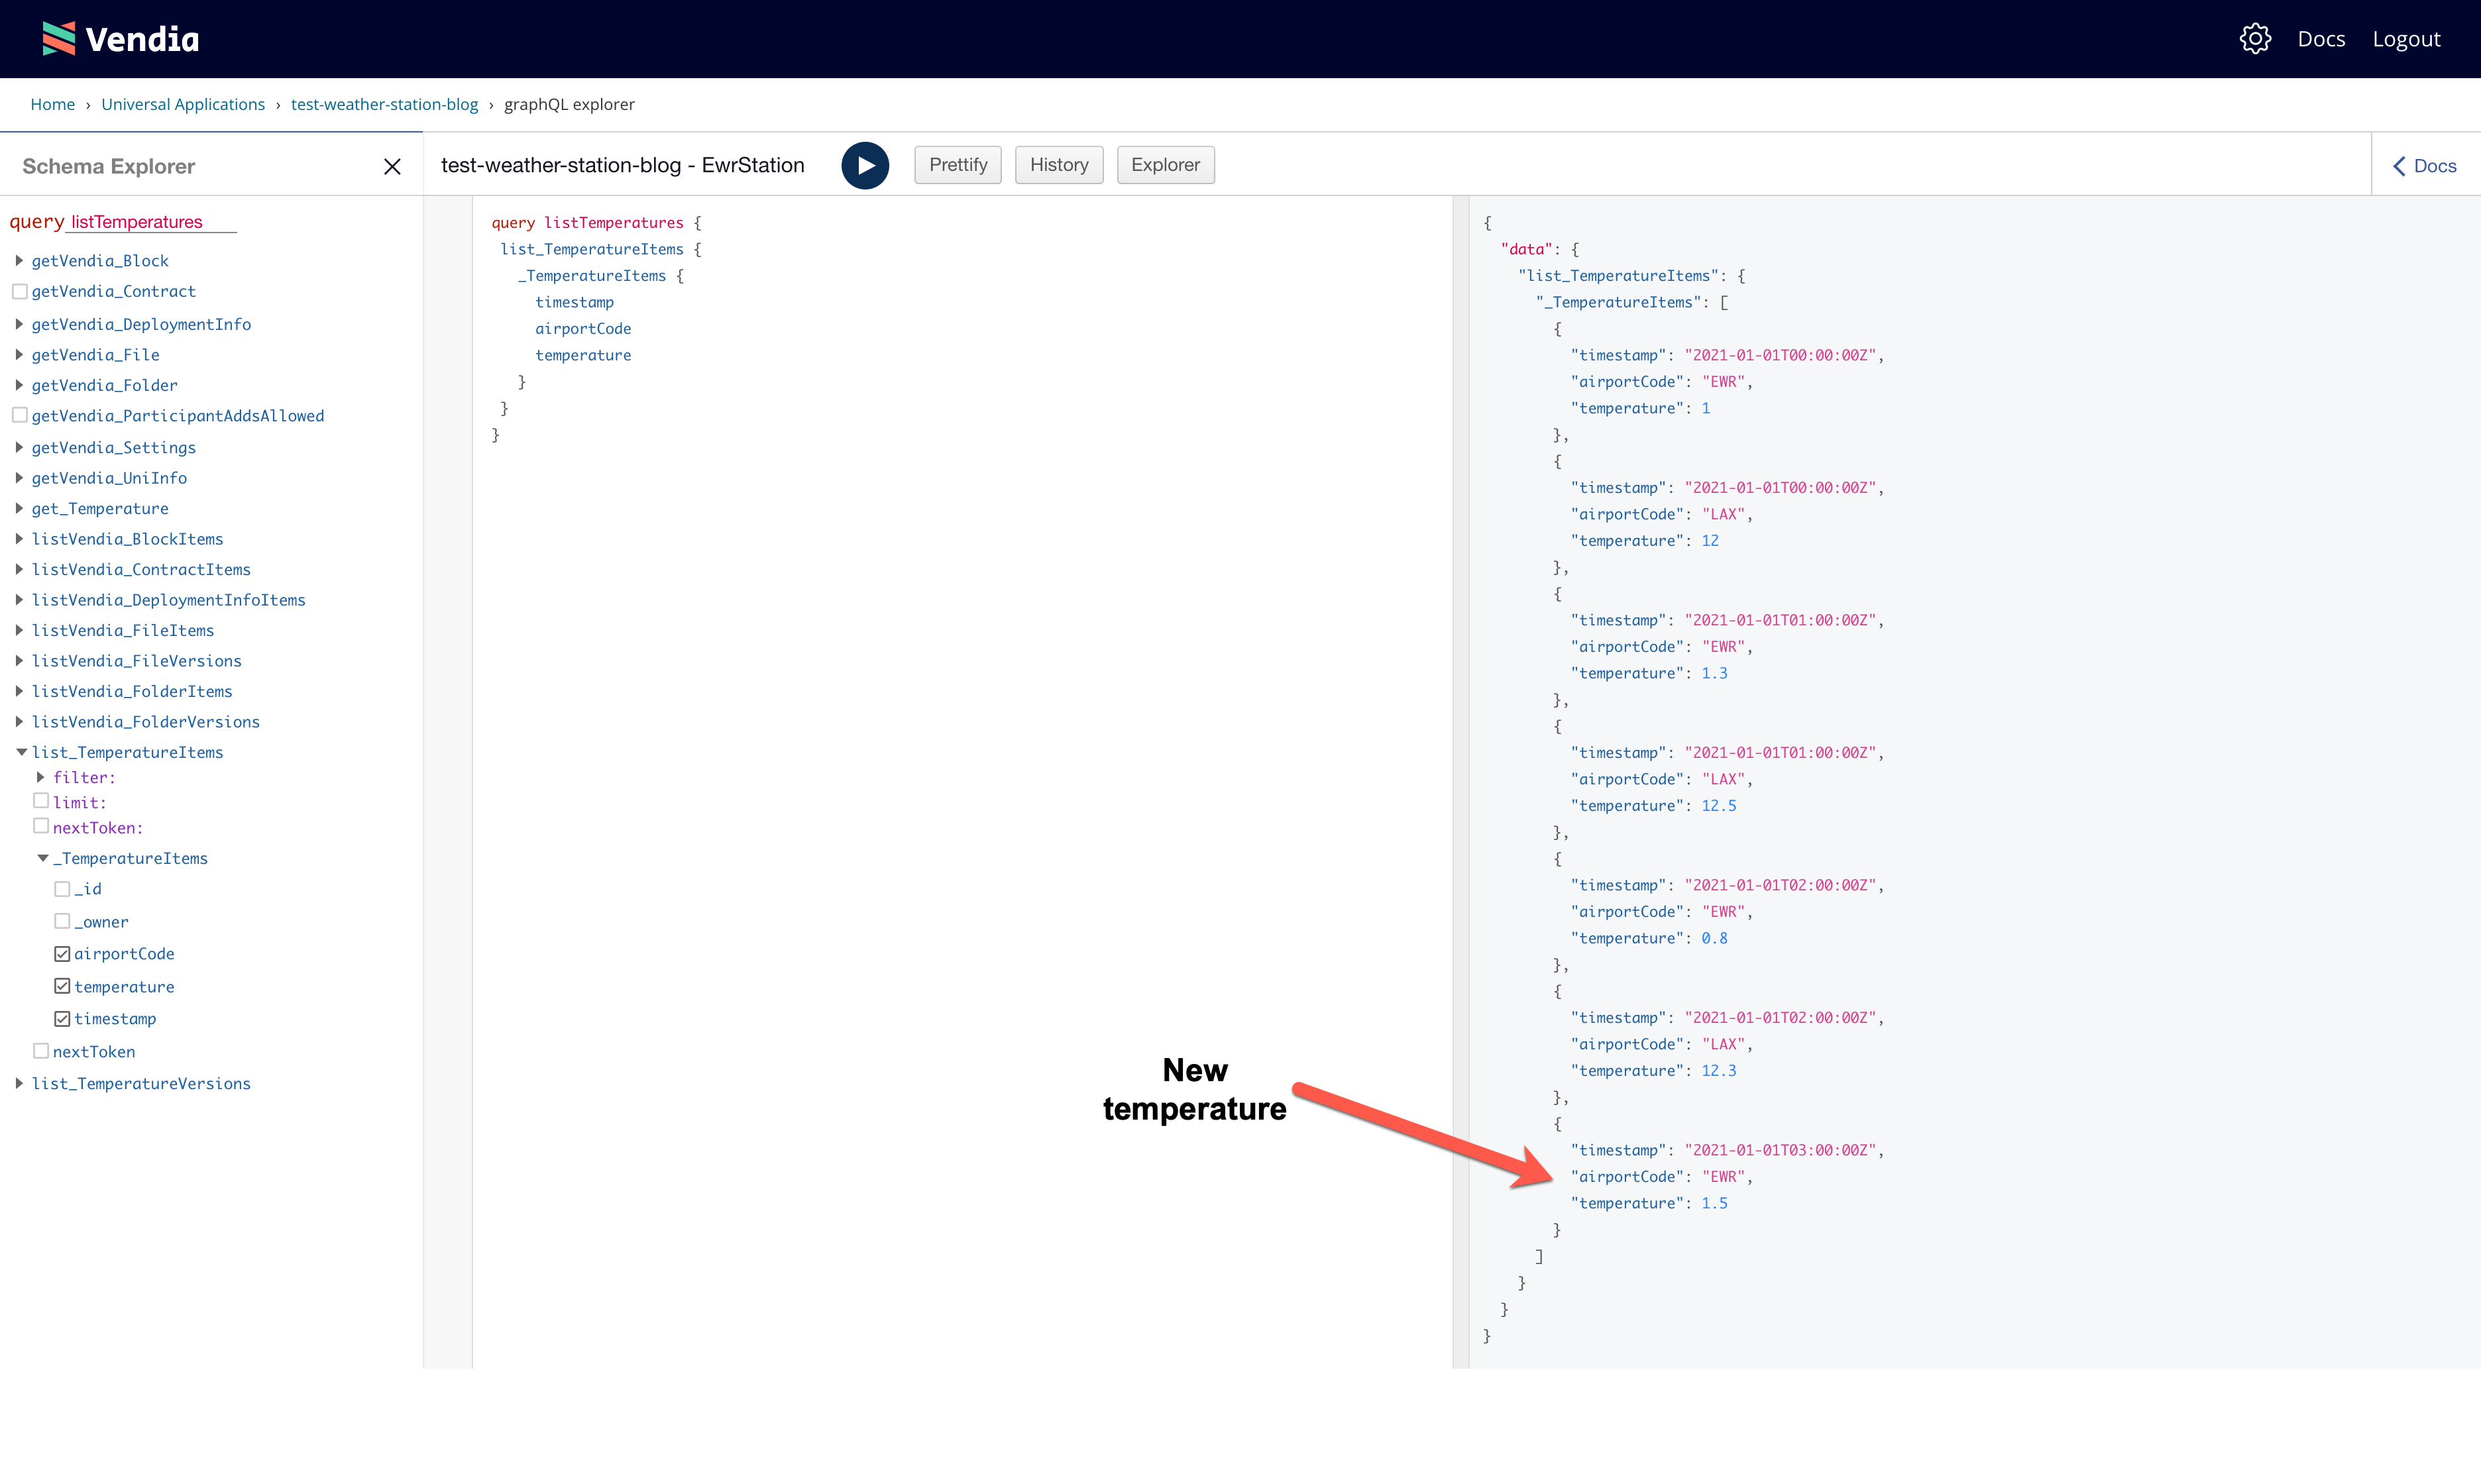
The results across both nodes - in separate AWS regions - are the same. Both reflect the newly added data.
Summary
What business value does Vendia Share provide when compared to deploying your own API?
While it's easy to get ACID semantics for a single database table in a single region in a single account for a single owner, it's much tougher when that data spans all of those divides. With enough time, money, and experienced engineers, great things can happen, but most companies are not focused on building a distributed database and transaction monitoring system across every major cloud provider. Fortunately, they can rely on Vendia to do that!
Vendia Share's Developer Preview release makes it easy to deploy nodes to any of the following AWS regions in just a few minutes:
- us-east-1
- us-east-2
- us-west-2
- sa-east-1
- ap-south-1
- ap-northeast-2
- ap-southeast-1
- ap-southeast-2
- ap-northeast-1
- eu-central-1
- eu-west-1
- eu-west-2
All the nodes in your uni can read and write data consistently, regardless of where the node is located in the world - Vendia creates, operates, manages, and monitors all aspects of your storage tier on your behalf.
Cleanup
To bring our example to a close, we can easily clean up the uni and its nodes using the uni delete CLI subcommand.
share uni delete --uni test-weather-station --force
NOTE: Adjust the uni name as appropriate.
What will you build on Vendia Share?
Sign up for the Vendia Share app, then explore our quickstarts for ideas on how to start tinkering and building quickly and powerfully.
